 EXCELLENT 4.4+ OUT OF 5
Reviews
Funtek Raid Adventure : A low-cost, Land Rover style RC car
 You will then have to unplug the 3 cables that go between the aircraft and the top plate but to do this you must first remove the plastic cable covers on either side of the body, just behind where the arms meet the centre frame. These are held in place by just 1 T6 torx screw each and some plastic tabs.
 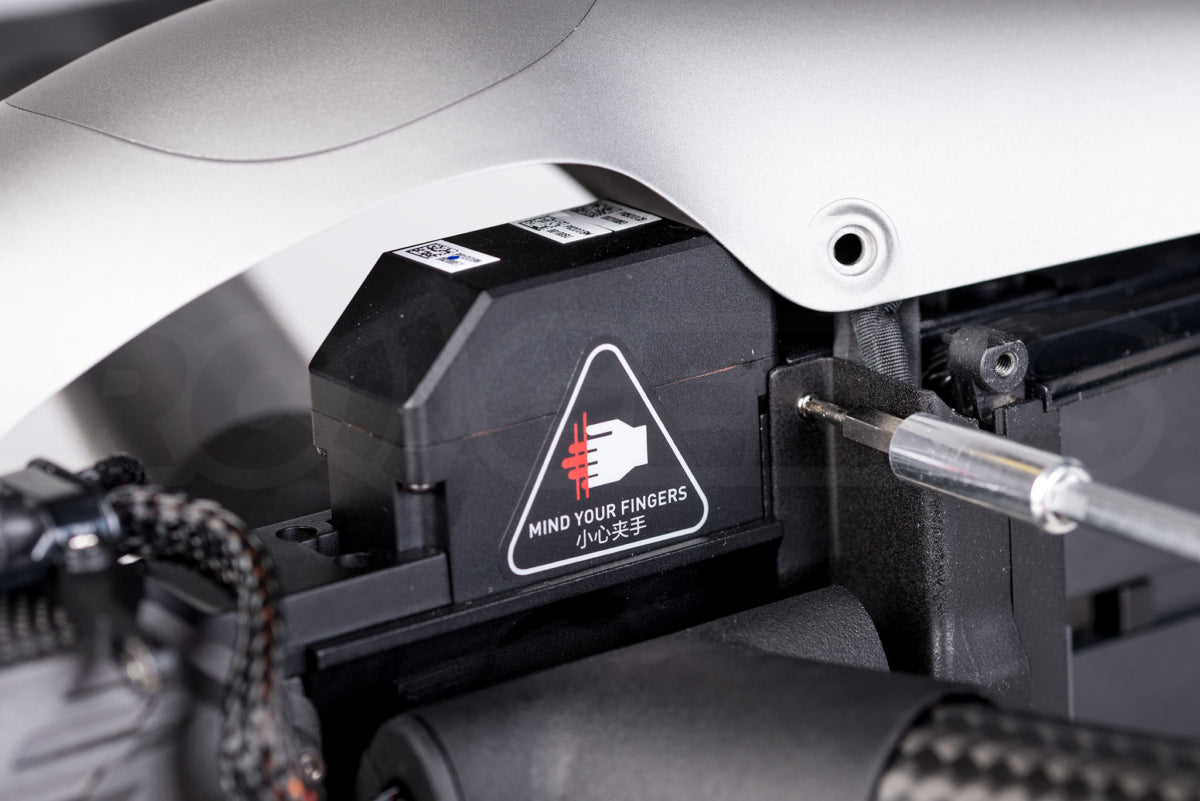 Once these are removed you can then identify where the cables run and what ones to unplug to free the top plate.
 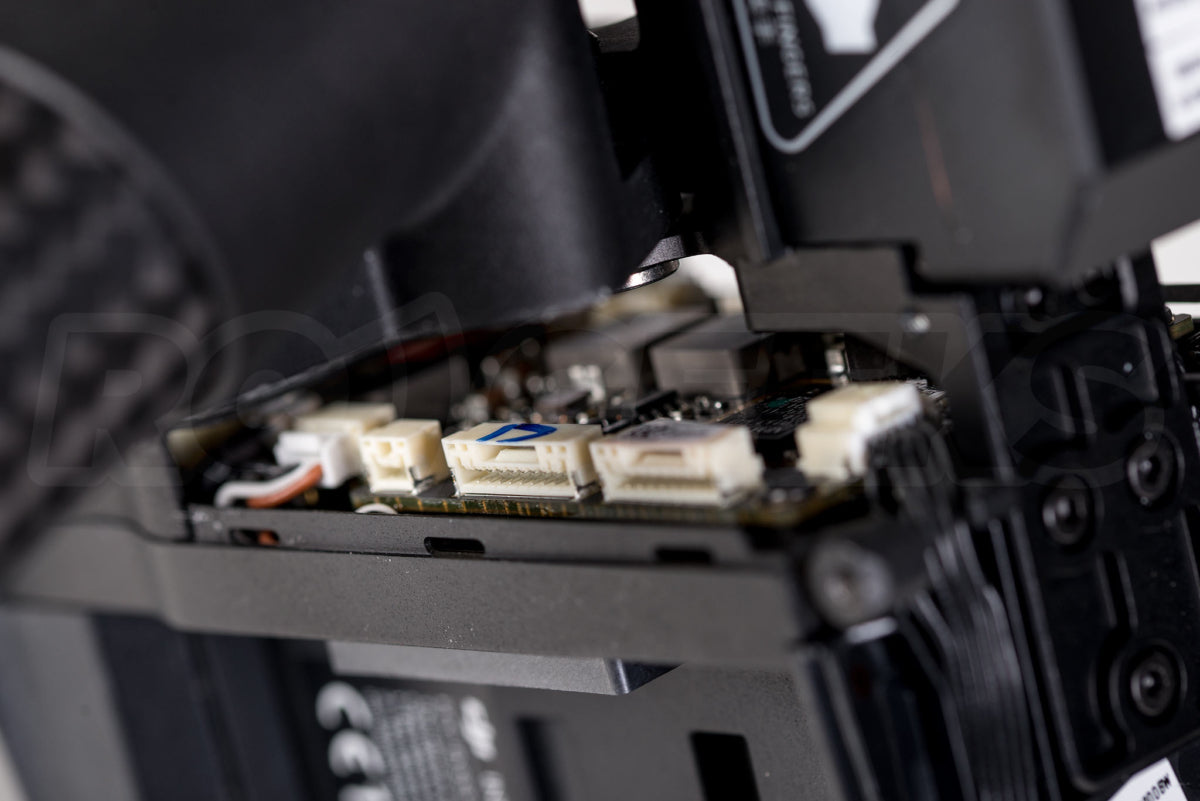 The top plate comprises the GPS puck, battery status LEDs, battery quick release button and the upward facing collision avoidance sensors.
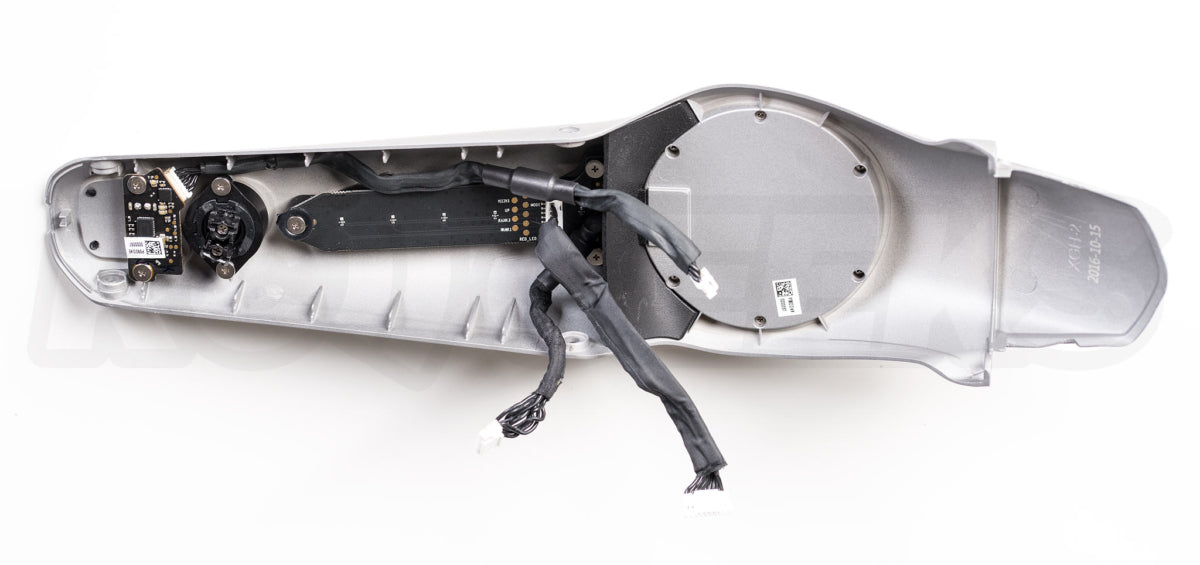
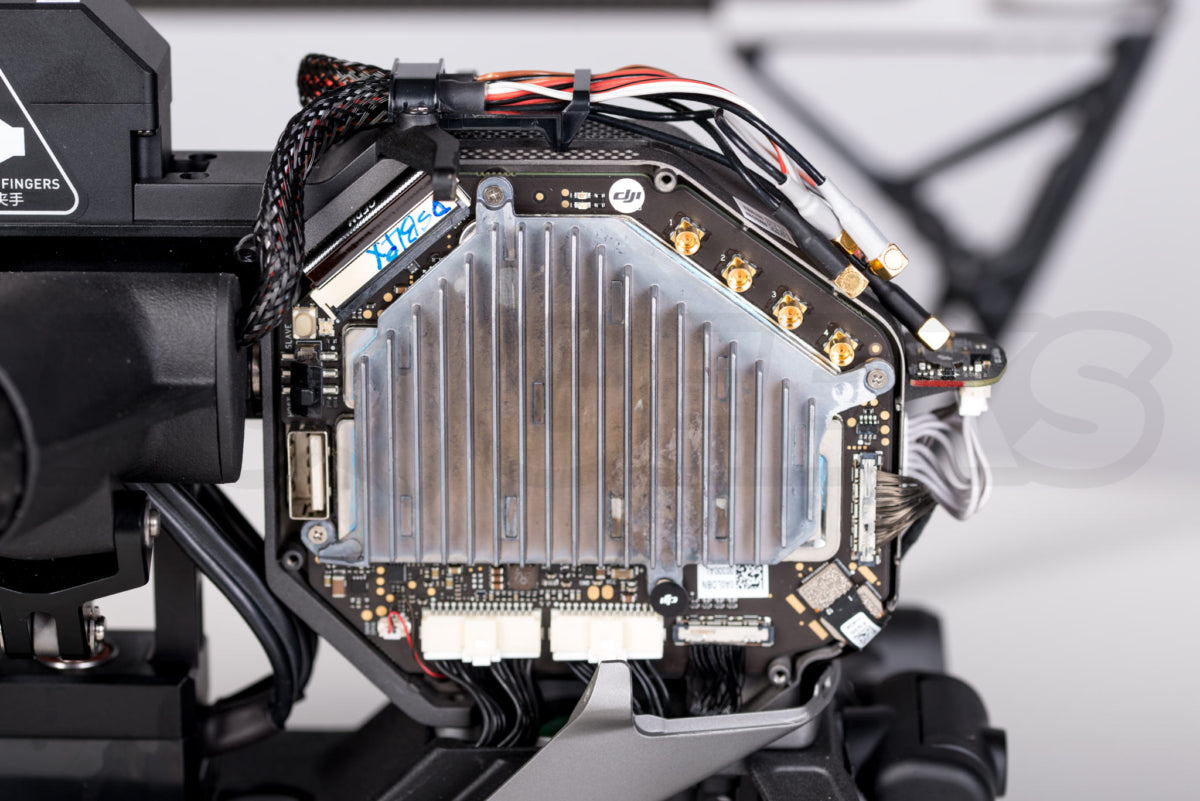
 Once this is off you are presented with the compass module which is attached to the flight controller and CineCore 2.0 processor which is integrated into one sleek unit encased in a grey metal casing.
 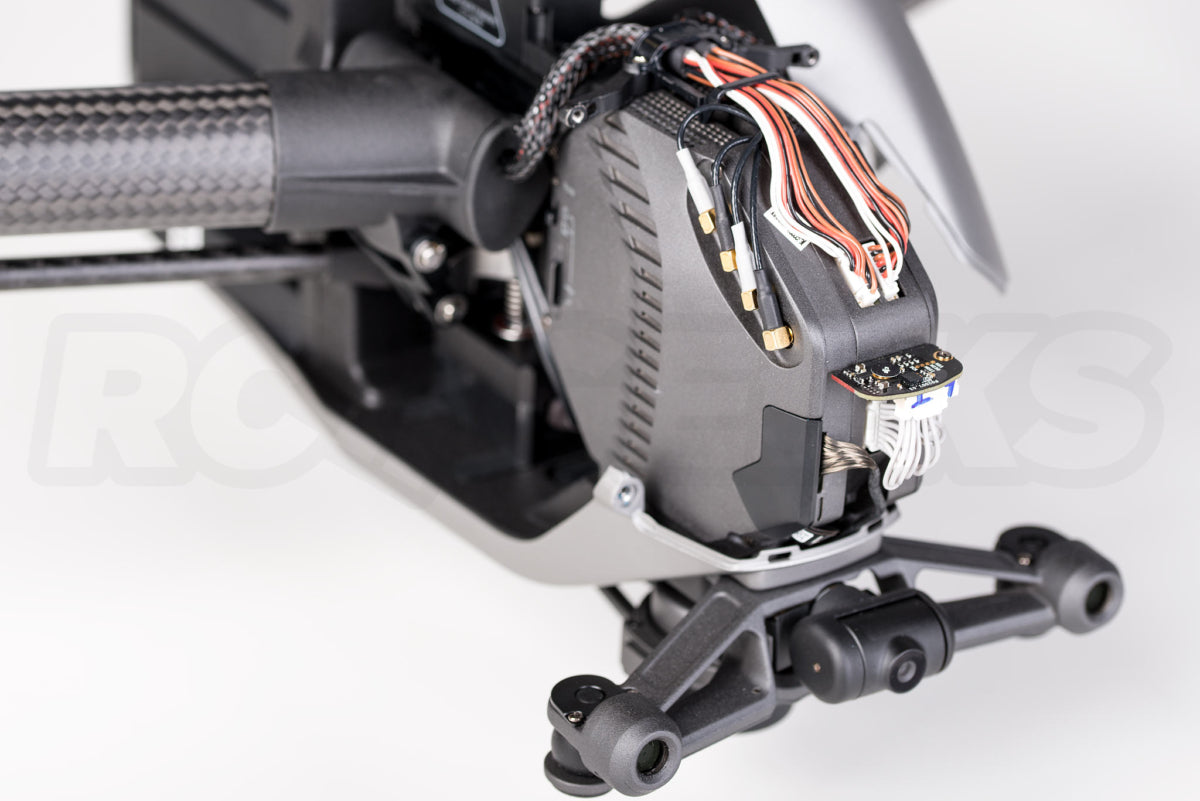 But of course, this is a tear down so we want to see behind the casing! To do this, there are 8 x T6 torx screws holding the side panels in place. Unscrew these to pull the side panels off, then there it is!


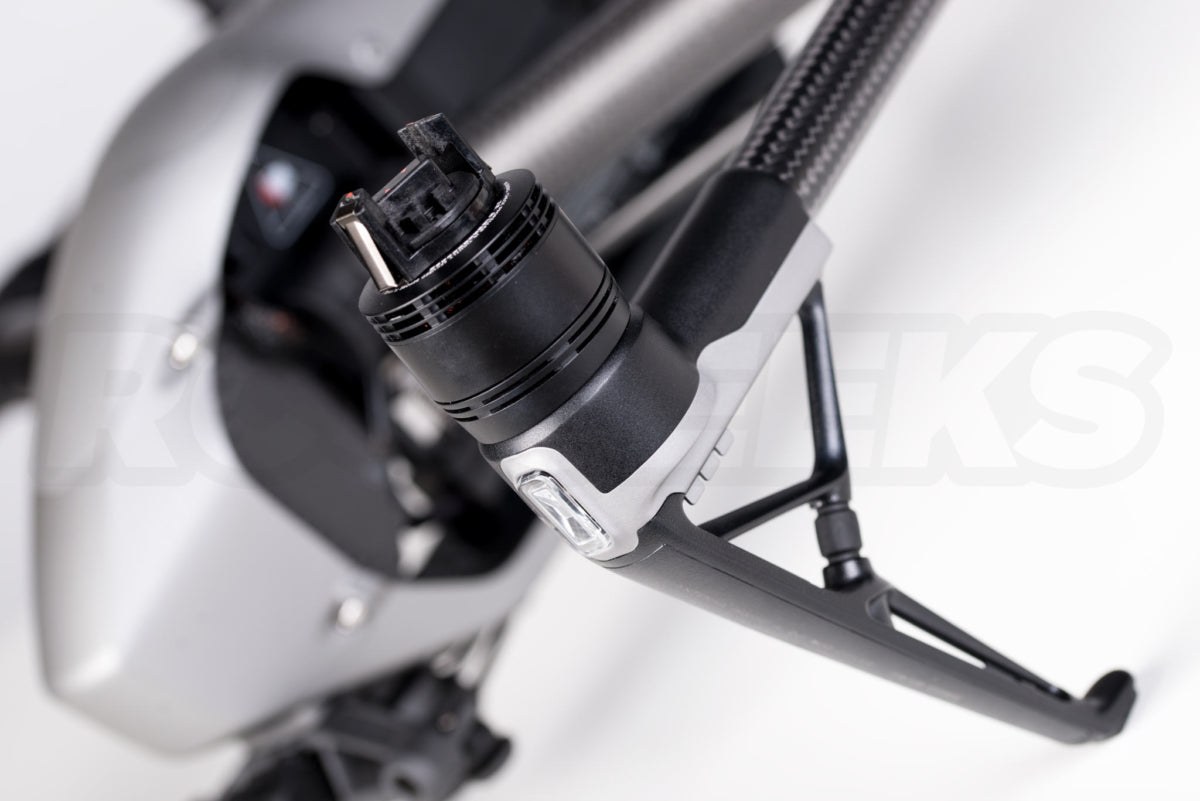 First off, to reveal the antenna, undo the 4 small phillips head screws on the back of the leg and pop off the antenna cover. You will then be presented with the antenna itself which you can just unplug from the cable instead of having to unsolder it like on the previous version.
 Now to take the leg off, remove the two long 2mm hex screws at the end of the arm (that was hidden by the antenna cover) and also the two smaller 2mm hex screws further back.
  You will then be able to pull of the leg, revealing more of the antenna cable and also two more 2mm hex screws that you will wan to undo in order to access the ESC module. Once you have done this, gently unplug the ESC cable and motor cable.
 The motor can then be dismounted by removing the 4 x 2mm hex screws underneath the motor.


 First off, before getting to the insides of the controller I removed the mobile mounting unit which bought to my attention that it's the exact same attachments the the inspire 1 controller uses to hold is mobile mounting unit. So just as a side note, I tried installing the i1 mobile mounting unit onto the i2 controller (and visa versa) and can confirm that they are compatible. One of the few things that are cross comparable in fact!
  The key noticeable difference with the HDMI module on the back the full size HDMI port (vs the HDMI Mini port on the i1). But once opened up it looks substantially different.
 It now has a cooling fan and heat sink on top of the board. To me, this seems a bit unnecessary as the old HDMI board would never get hot and I can't imagine changing the mini HDMI to a full size port will make much, if any, difference on heat emitted. But hey, i'm sure they did it for a reason. It still essentially is secured and plugged in the same way as before. Simply undo the 3 phillips screws and carefully remove the 3 ribbon cables.
 To open up the controller itself, remove the 4 rubber grips on the back to reveal 4 phillips head screws. Once these are undone you should be able to pop the two half of the controller apart. Be careful doing this as the two halves will still be connected by battery cable. Apart from the colour of course, the back half looks identical to that of the Inspire 1's controller.
  The front half is similar but has some minor changes. The main change again being a large cooling fan and heat sink.

Written by
Phil Harris