 EXCELLENT 4.4+ OUT OF 5
Reviews
Funtek Raid Adventure : A low-cost, Land Rover style RC car
 Weighing just 3.3kg but with a MTOM of 8.2kg the S900 is hugely capable. There has been a lot of interest in getting this aerial platform below 7kg to help with the CAA rules of congest areas. Using a Genace 9,000mah battery we have managed to get the take-off weight to 6.95kg and achieve a flight time of 12 minutes. This setup was using the Panasonic GH4 and includes a Lightbridge HD video link.
This blog will be divided in to 2 parts. Part 1 will cover the box contents and build of the S900.Part 2 will cover the transmitter, camera and battery setup. This blog can be used as a basic guide to assembly, previously building experience is recommended as there are several areas not covered in the blog.
The equipment used is shown below. For our sub 7kg setup we will be going for a 2 pilot setup, this is the only way to have complete control of the gimbal. This allows the pilot to have control of the aircraft, and the camera man to have full control of the gimbal on the 2nd transmitter.
Equipment used:
DJI S900 + A2 + Z15-GH4 Gimbal
DJI Lightbridge Full HD Video Link
Futaba 8J x2
DJI Canhub
Genace 9,000mah Lipo Battery
The S900 is packaged in slick black box, the quality of the contents is quickly apparent from the carbon fibre contents which is extremely light.
Weighing just 3.3kg but with a MTOM of 8.2kg the S900 is hugely capable. There has been a lot of interest in getting this aerial platform below 7kg to help with the CAA rules of congest areas. Using a Genace 9,000mah battery we have managed to get the take-off weight to 6.95kg and achieve a flight time of 12 minutes. This setup was using the Panasonic GH4 and includes a Lightbridge HD video link.
This blog will be divided in to 2 parts. Part 1 will cover the box contents and build of the S900.Part 2 will cover the transmitter, camera and battery setup. This blog can be used as a basic guide to assembly, previously building experience is recommended as there are several areas not covered in the blog.
The equipment used is shown below. For our sub 7kg setup we will be going for a 2 pilot setup, this is the only way to have complete control of the gimbal. This allows the pilot to have control of the aircraft, and the camera man to have full control of the gimbal on the 2nd transmitter.
Equipment used:
DJI S900 + A2 + Z15-GH4 Gimbal
DJI Lightbridge Full HD Video Link
Futaba 8J x2
DJI Canhub
Genace 9,000mah Lipo Battery
The S900 is packaged in slick black box, the quality of the contents is quickly apparent from the carbon fibre contents which is extremely light.
 Included are the 6 pre-assembled arms and motors. The 400rpm/V 500w motors are powered by 40A ESC’s.
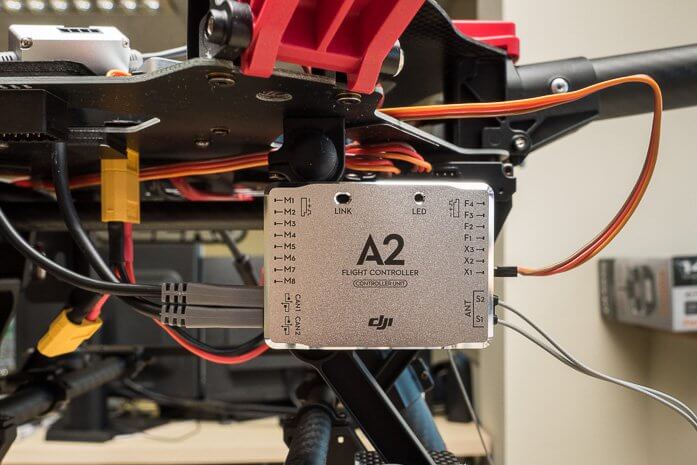
 We will be using the A2 flight controller, incredibly precise and smooth, with 12 output channels and a large high gain GPS antenna. We have also built several of these with the WooKong flight controller.
 So moving on to the first stages of the build, first you need to make sure you unscrew both screws on the clamps and attach the legs in to the landing skids.

 The legs are then attached to the airframe.
 Attached will look like so, ensure you attach the spring to the legs and metal wire.
 Next step is to attach the arms to the airframe. It is important to attach the arms in the correct order.
M1 and M2 are the front arms with red mounts. M1, M3 and M5 rotate counter-clockwise, while those on arms M2, M4 and M6 rotate clockwise.
Next step is to attach the arms to the airframe. It is important to attach the arms in the correct order.
M1 and M2 are the front arms with red mounts. M1, M3 and M5 rotate counter-clockwise, while those on arms M2, M4 and M6 rotate clockwise.
 To start installing the electronics, the S900 has a handy removable top-plate not fitted to the S1000. This makes it much easier to wire and connect everything inside the airframe.
 Highlighted are the screws you need to remove to get this plate off.
 Attach wires, careful of the positive and negative connections. Also attach the signal leads.
 Connect the power wires as shown here.
 Plate re-attached.
 Attach the signal lead for the motor wires here.
 Install A2 in position, IMU must go as shown here. It is very important this is attached firmly and with some strong double sided tape.
 LED Module mounted underneath.
 Attach A2 Flight controller
 Attach the GPS antenna, this should end up in the very centre of this plate. It includes 4 different length mounting tubes, we used the 3rd longest. These need to be glued in place.
 Attach motor signal wires.
 Attach landing gear wires to the F1 port on the A2 Flight Controller.
 The A2 should be connected like so.
 Once configured, our A2 settings were shown in this picture. This could change on your build depending on GPS location.
 Aircraft Mixer type.
 RC settings.
 The finished setup should look like this.
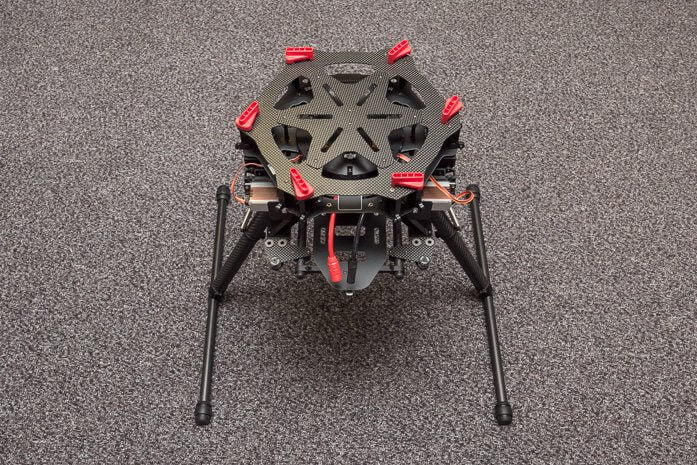
 And the completed S900 (before adding gimbal and Lightbridge).
 Next stage will be attaching the gimbal, Lightbridge and battery. When the final build is complete we will get a take-off weight of this setup with the Panasonic GH4, Lightbridge and battery.
To proceed to part 2 of our blog please click here.
Next stage will be attaching the gimbal, Lightbridge and battery. When the final build is complete we will get a take-off weight of this setup with the Panasonic GH4, Lightbridge and battery.
To proceed to part 2 of our blog please click here.

Written by
Dan Wheeler