 EXCELLENT 4.4+ OUT OF 5
Reviews
Funtek Raid Adventure : A low-cost, Land Rover style RC car

 We start with the F113 chassis, a box measuring 430 x 225 x 115mm. The completed kit promises to be 410x200x95 with a wheelbase of 270mm and a weight of around 1100g.
 We will be re-using the excellent 3Racing wrench set, along with some pliers, scissors, knives and files to tidy some of the pieces up. You will also need some thread lock and some superglue (not pictured).
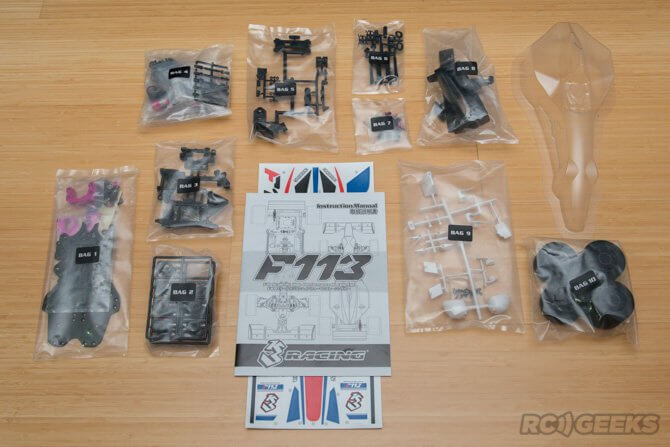 As with other 3Racing kits, the parts are bagged up and labeled. There is a lot more ‘cross packing’ than in our drift car build; Often you will be asked to find screws from bag one when quite far through the manual. I’d advise keeping them all in a tray as you are offered few spares.
 We start to construct the rear subframe with its fancy anodized motor mounts.
 Then it’s time to build the rear axle. Careful opening the smaller bags, picking up all those small ball bearings off of the floor is no fun. Pay careful attention to which thrust bearing goes where when building this complicated axle up. Fit the grub screw into the cap before slipping it into the end tube to tighten it down.
 You then fit the correct axle spacer depending on what ride height you decide on, we went for stock.
 A quick snap of the rear subframe with the axle in place.
 Here is the graphite deck, shown built with the stands and plastic arms fitted to let the rear sub-frame flex. The rear deck shown at the back has a centrally mounted swivel point and is also mounted to two sprung tie arms.
 The front end has two anodized parts that support the lower arm and upper arm mounts. Here we have fitted the lower arms with the droop screws sat on metal plates.
 We then added the front graphite bulkhead to provide the upper suspension mount points and the nosecone mount.
 The lower arms fitted with the ball joints for the front suspension.
 Building the shocks can be a laborious process. Filling them with the included #700 oil, makes for some firm dampening. Ensure you line up the damper shaft correctly when screwing in the grub screw. Here are the shocks built and mounted.
 Upper arms, ball cap and knuckle arms in place on the front left.
 I neglected to take more detailed photos at this stage but the rear subframe has a central rolling damper that resists shear motion across the rear of the chassis. It connects (with no spring) the rear subframe upper plate with the graphite chassis roll plate.
 This is paired with a single, large rear shock running softer #350 oil, all built up ready for mounting at a later stage.
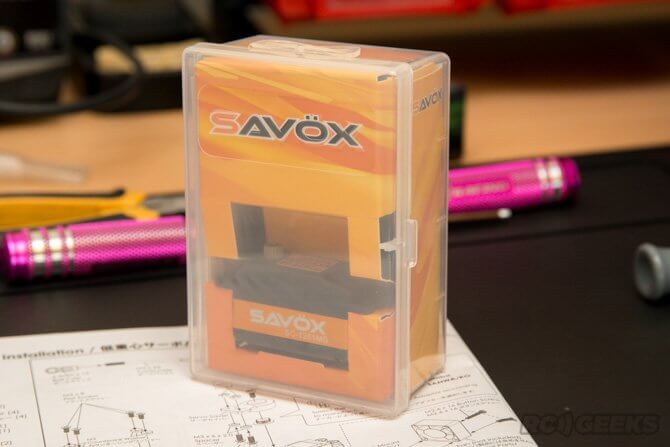 The kit comes with mounts for a low profile servo. We opted for this lightweight Savox SC-1251MG coreless 9KG servo. It is attached to two plastic mounts that sit on the anodized piles and leave the servo at a 45degree angle to the chassis.
 You can mount a full-size servo in the chassis if you are willing to trim the mounting tabs off of both ends. You will need a set of vertical servo mounts that are not included in the standard kit to affix the servo to the chassis plate.
 With the servo mounted in place we could attach the steering arms and complete the front end.
 Our bundle includes the Speed Passion Champion Combo Set. This includes a motor, esc and all the drivetrain wiring, pre-terminated and ready to install. Please note that this bundle edition does not include the program card or USB cable.
 It was time to add the speed controller. The competition combo set comes with the Reventon S speed controller. The loom comes preinstalled with a deans connector and pre-terminated for plug and play compatibility with the bundled motor. With a max continuous current of 40A, this ESC has built in temperature and voltage sensors to get the most out of your setup. The programming card, USB cable and expansion module are not included, but purchasing them separately will allow you to update the firmware and also update settings via Bluetooth or a wireless network.
 The brushless motor that comes with the combo is a 17.5R ‘turn’ motor from the ‘World Champ Gene Competition 3.0’ range. It has push connectors in the end that you will need to pull out with pliers before plugging in the (pre-terminated) leads from the ESC. It also includes the multi-pin sensor lead, seen here with the factory webbing and heat shrink in place.
 The mod of the spur gear is a little different at 0.4. We ordered this 20 tooth pinion in from HPI Racing especially.
 With the motor in and fitted, we used just two screws in the anodized concave washers but three are provided to hold it in place.
 Getting closer to the end of the build, the pace picked up as I get excited to drive it so excuse the lack of photos at this stage. We mounted a full-size battery on the chassis floor. If you have a shorter battery the kit does come with a set of battery mounts that screw through the floor to hold it further forward, leaving more space behind for radio gear. The graphite top deck is screwed in place and the rear shock is mounted.
 The last step for the chassis is adding the wheels. The tyres come pre-fitted in the box. Note that the fronts use these small washers on the outside as well as a pair of bearings per wheel.
 Whereas the rears are simply attached to the rear axle with wheel nuts.
 Here are some photos of the completed chassis with the front and rear wings installed.

 The completed front end showing the steering and suspension setup.

 The included speed passion electronics comes with some long wiring allowing flexibility of installation. We may shorten these before fitting the shell.
 Some close ups of the ‘business’ end.
 We attached a spare HK GT2 radio set to this that we had lying around. For now we have mounted the receiver and the speed controller to the side of the battery with some double-sided tape but this is not the final solution.
 The final chassis, ready for testing and configuration.

Written by
Tom Begley