 EXCELLENT 4.4+ OUT OF 5

Reviews
Funtek Raid Adventure : A low-cost, Land Rover style RC car
 Nerf Stryfe - Before and After the Worker Mod Conversion[/caption] Although Nerf Blasters are essentially toys, they can be so much more when you add some third-party modifications to the mix. In this blog, we'll take a look at some of the modifications now available from RC Geeks, how to install them, and how it affects the appearance and performance of the blaster.
 The first piece we need to remove is the nozzle. This gets replaced by the Worker equivalent, which then allows you to attach the extended firing tube and flash hider. At the same time, remove the screws from the flywheel housing and gently pull out the original white flywheels. The replacement nozzle just slots into place where the original once sat, likewise with the Blasterparts flywheels: [gallery ids="https://cdn.shopify.com/s/files/1/0263/8469/5395/files/nozzle-on2.jpg|Worker Attachment"] Screw everything back into place, and that is internal part of the Nerf mod complete. We'll open it back up next week and replace the motors.
  When reattaching the Jam Guard, make sure it clips into place securely as this can prevent the blaster from firing after you've finished modding. Take it from us, this is very annoying. You can remove this function altogether, we'll show you how to do this as this series continues.
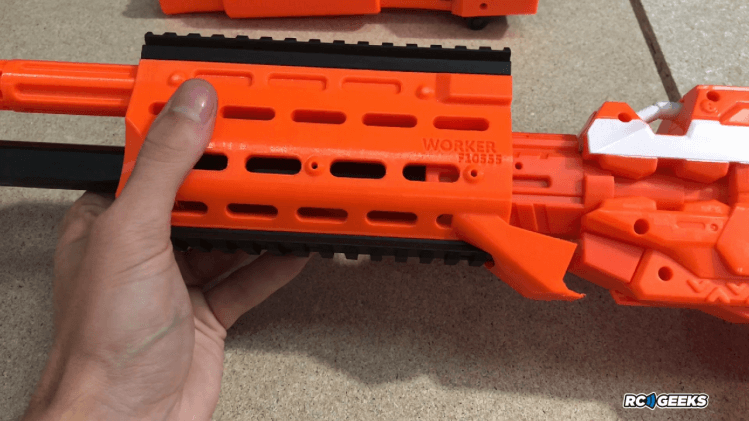 Next, install the attachment below as shown, and secure with the included cylindrical pin. The Picatinny Rails are just screwed into the place. [gallery columns="2" ids="https://cdn.shopify.com/s/files/1/0263/8469/5395/files/secure-nozzle2.jpg|"] The smaller Picatinny Rail can't be attached until you've inserted the side attachments, which just slot into the gap as follows: [gallery columns="2" ids="https://cdn.shopify.com/s/files/1/0263/8469/5395/files/picatinny-attachment2.jpg|Side Picatinny Rail"] At this stage, the Nerf Mod is starting to really take shape. The next piece to install is the Longer Picatinny Rail, which slots into place over the existing Nerf Rail. An advantage of using a Picatinny Rail instead of the Nerf Rail is that there is a much wider variety of accessories and attachments available for this type of mount. The Longer Rail slots on to the blaster from front to back, meaning that you'll need to adjust the flash-hider slightly. You could always install this mount earlier in the mod to avoid this. Hindsight is a wonderful thing.
  Finally, the Stock is attached to the back of the blaster, and the sight installed onto the top Picatinny Rail. [gallery columns="2" ids="https://cdn.shopify.com/s/files/1/0263/8469/5395/files/sight.jpg|Mechanical Sight"] The Worker Nerf Mod No.153 is currently £89.99 and one of the first kits available from RC Geeks. Check back in with us in a few weeks when we'll have more kits and mods available.
 The completed Worker Nerf Mod makes a nice addition to RC Geeks' arsenal
Written by
Jamie Justice