We are always looking to improve our drone photos and videos, but can a filter help us do that? What on earth is an ND? Do I need a CPL? In this blog we attempt to answer these questions, taking a look at how using a filter can not only
protect your camera but also how it
alters the images it takes.
What are filters for?
Most high-end drones will come with a
removable glass element on the front of the camera that can be swapped out for a filter. In brief filters can:
-
Protect the front element of your drone camera
- Control the amount of light hitting the sensor (see ND)
- Control the direction of light hitting the sensor (see CPL)
- Select which wavelengths of light hit the sensor (colour tinting)
In this blog we are going to look at some of the more
commonly used filters in aerial cinematography and find out what they are used for.
What are ND Filters for and what do they do?
Simply put, ND filters 'shade' the camera lens a little like sunglasses do for the human eye. ND stands for 'neutral density', intended to reduce the intensity of light without changing the colour or hue. So by fitting the right ND filter, you can limit the amount of light that hits the sensor. We can use this to correct an overexposed image (one that is blown-out or overly bright) without altering the shutter speed, aperture or sensor sensitivity (ISO). ND filters are commonly labelled with an NDnumber which indicates their optical density and increases in as a multiple the 'more opaque' they become. Most photographers will refer to them by the number of 'stops' or 1EV difference in the light as measured by the camera. For example an ND4 will reduce the exposure by 2EV, an ND8 by 3EV, an ND16 by 4EV and so on. You can see a filter attached to the phantom below, note that you can
no longer see the camera lens/aperture due to the reduction effect of the ND filter.

Lets use a
practical example of an ND filter, in this case on a Phantom 4 Professional. We are setting up the camera to
shoot video but for ease of comparison we have shot in photo mode. The camera is set to
manual exposure and have set the
ISO level to 200 to minimise any noise in the image. Since we will be shooting at near enough
24 frames-per-second we want to maintain a
shutter speed of 1/50 (roughly double the frame rate for a 180° shutter angle). On a sunny day that would result in an overexposed photo with blown highlights as seen in the first frame in the below image. To combat this we can fit an
ND-8 filter and try again with the second image, an
ND-16 for the third (which gets it pretty much perfect) before finally trialling an
ND-32 which took it too far. Click the image to view it full size.

As you can see, ideally you will need a
range of ND filters on hand to ensure a correct exposure in changing light conditions. Here are those images again with the
application UI still sat over the top to show that none of the camera settings were changed, again click the image to view it full size. We would recommend keeping an eye on the
histogram (available in the camera settings) circled in green for the best representation of the exposure. Note that in the third, correctly exposed frame, very little of the graph values are falling off of the end of each side. For beginners also see the red circled
EV value which you can use to help you track if the camera thinks it is correctly exposed; Note how its zero's out when the correct exposure is achieved.

Now we could increase the shutter speed to limit the amount of light coming into the camera but it would give our video frames an unnatural sharp appearance and any motion would be quite jittery. It is important to make the distinction between
frame rate and
shutter speed. For instance your Mavic Pro might be recording 30 frames every second (of image data) but the shutter can be opening and closing 300 times in that same second. In the past people have used ND filters to drop the shutter speed to somewhat 'mute'
jello effects, but we suggest tackling the imbalance in your craft flight instead.
What are CPL Filters for and what do they do?
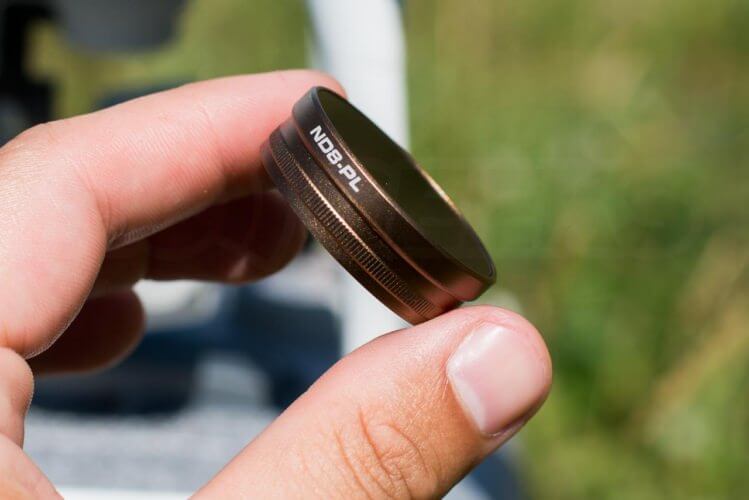
Circular PoLarising filters (CPL for short) are used to polarise light coming into the camera, increasing sky contrast, manage reflections from water or glass and reduce glare. Circular polarisers will normally have an adjustment ring around them (see the ridged surface on the filter barrel below) for rotating the element (but not the actual filter housing itself) allowing you to line up filter to let the desired light angles through. Its difficult to put into words but this
animation on wikipedia shows the effect it in action, neutralising light coming in one plane from behind the filter.
Some manufacturers, such as
Polarpro offer CPL stacked with an ND filter, providing an all-in-one solution for drones (stacking filters often adds undesirable weight and causes gimbal imbalance) and we have used these for our test image. We use polarising filters to cut down on glare and make the image appear more vivid. The below image shows the polarisation effect in action. We fitted the filter, rotated it to the '
maximum correction' took a photo, rotated it to minimum correction and took another photo to compare. None of the camera settings were changed between the photos, only the filter itself; Click the image to view it larger.

Note how the blues in the sky really come alive when the
scattered light is filtered from the image. The foliage takes on a richer green and although not quite as clear, the reflections from the water below the craft have also decreased, darkening the stream. Its worth remembering that circular polarises need to be adjusted to suit the direction in which the camera is pointed. The relationship between the camera and the sun is
key, as turning away means the light is approaching at a differing angle and the correction effect is likely to be
lessened. This can be a pain when shooting as you must be intelligent with your usage, ensuring you re-adjust as the position of the sun and craft change.
Graduated Filters - what are they for?
Graduated filters are designed to help increase the camera's dynamic range and assist in correctly exposing scenes which lack perfect lighting. They also offer
creative adjustment of an image such as adding colour tone to the image. It is important to install these filters at the right angle to achieve the correct effect. The orange soft edged fade filter pictured below is designed to add warmth to an image, ideal for
improving a sunset.

The blue filter below
intensifies the blue in the top of the frame while also reducing the shutter speed on the top by 1.3 stops, and tapers to clear at the bottom. Designed to cool down the color of the sky and add intensity without shifting the color of the ground.

Polarpro supply
a set of graduated filters that can be used on
any X3 camera (including the
DJI Osmo)
Filter installation and care
Whilst the filter does protect the lens, the filter itself can be very expensive and thus some care is required when handling. As with any optical equipment its imperative to ensure the filter is clean, without smudges or dust specks. Many filters come with a
foam-lined carry-case for storage and a
micro-fibre lens cloth for cleaning any errant fingerprints.

The majority of filters are a
screw fitment. On our DJI Phantom 4 Pro we needed to remove the standard clear front element from the camera to reveal the filter ring thread by unscrewing it counter-clockwise.

There will be times where the filter or the standard front element
can be stuck on. Don't panic and try and force it off, instead reference the below graphic which offers some advice on how to remove a them from the camera without damaging it.

What are the pros and cons of aerial filter use?
Whilst we have covered the uses and benefits, it is only fair to touch on the
negatives. There is the potential of loss-of-sharpness when adding any additional layer of glass in-front of the sensor, so its important that you purchase the
highest-quality filters you can afford which are often expensive. In our experience variable ND filters are
to be avoided due to the compromises in their design to provides adjust-ability. Whilst it might seem obvious after this blog, remember that most elements will
cut down the amount of light reaching the sensor which is undesirable on an overcast day. Any extra load on your gimbal will further test the motors ability to smooth out motion, thus filters that aren't
drone specific should be used with caution. CPL filters need to be
used intelligently, with respect to the position of the drone and the sun as rotating will show an obvious change in light polarisation. Filters are produced for a
set ring size and are not interchangeable (without employing step up/down rings), thus your set of Mavic Pro filters aren't going to be usable on your Phantom 4 Pro. Filters can cause
vignetting on wider lenses as light entering the edges of the filter will do so at an angle that effectively makes it thicker. In some circumstances they can also induce flare (depending on materials or coatings) and affect the focusing ability of the camera. That said we feel the benefits
outweigh the drawbacks, filters open up new opportunities for your drone without replacing the camera.
Post production - Preset LUT's
A quick note regarding editing. Assuming you are shooting in RAW, you are doubtless aware that there is more that can be achieved with the footage in post production. Whilst this blog focuses on capturing the best 'in the field' it is worth noting that filter manufacturers are also offering preset 'LUT's' for achieving some of the more creative filter looks in software. You can see the effects of this in this
colour preset demonstration video from Polar Pro. These presets are now available for the
Mavic Pro and also the
Phantom 4 Pro/Adv.
RC Geeks - Polarpro stockists
Ditzco, Freewell and of course
DJI themselves offer filters for their drones, but our provider/manufacturer is
Polarpro. We believe their
range of filters and accessories offer great quality and good value. Looking for filters for your
Mavic Pro? The
Cinema series Shutter filter pack offers 3 grades of ND filter, whilst the
Cinema series Vivid filter pack offers ND filters with integrated circular polarisers. Alternatively pick up the complete cinematographer kit with both filter packs,
lens hood,
landing gear extensions,
memory card reader and lenspen as a pack. They also offer a replacement gimbal lock,
soft case and mounting solutions for both
your smartphone and
the drone itself. PolarPro have a whole
load of options for your Phantom 4 from a
basic UV filter,
3 packs of ND or
3 packs of ND/PL stacked filters, stacked ND/PL
up to 128 or straight ND's up to
256! If you have the
DJI Spark we also a three pack with
fixed polariser and twin ND, or a
six pack with a larger range, not to mention a
slimline carry case. Do you have any questions, or have you spotted errors or inconsistencies in the article? Do you have any experience using filters on your drone? We welcome feedback, so please leave us a message in the comment section below!
 EXCELLENT 4.4+ OUT OF 5
#/media/File:Animation_polariseur_2.gif)